This post contains affiliate links. As an Amazon Associate, I earn from qualifying purchases, at no extra cost to you.
Snowy mornings don’t have to mean soggy paws and frozen standoffs on the porch. With a few smart tweaks to your outdoor setup, your dog can dash out, do the business, and zip back in—no drama. These ideas focus on simple structures, clever layouts, and durable materials that keep feet dry and routines quick. Ready to turn that icy dash into a smooth pit stop?
⭐ Our Top Pick: See it on Amazon
1. Build A Porch Potty Nook With a Wind-Blocking Overhang
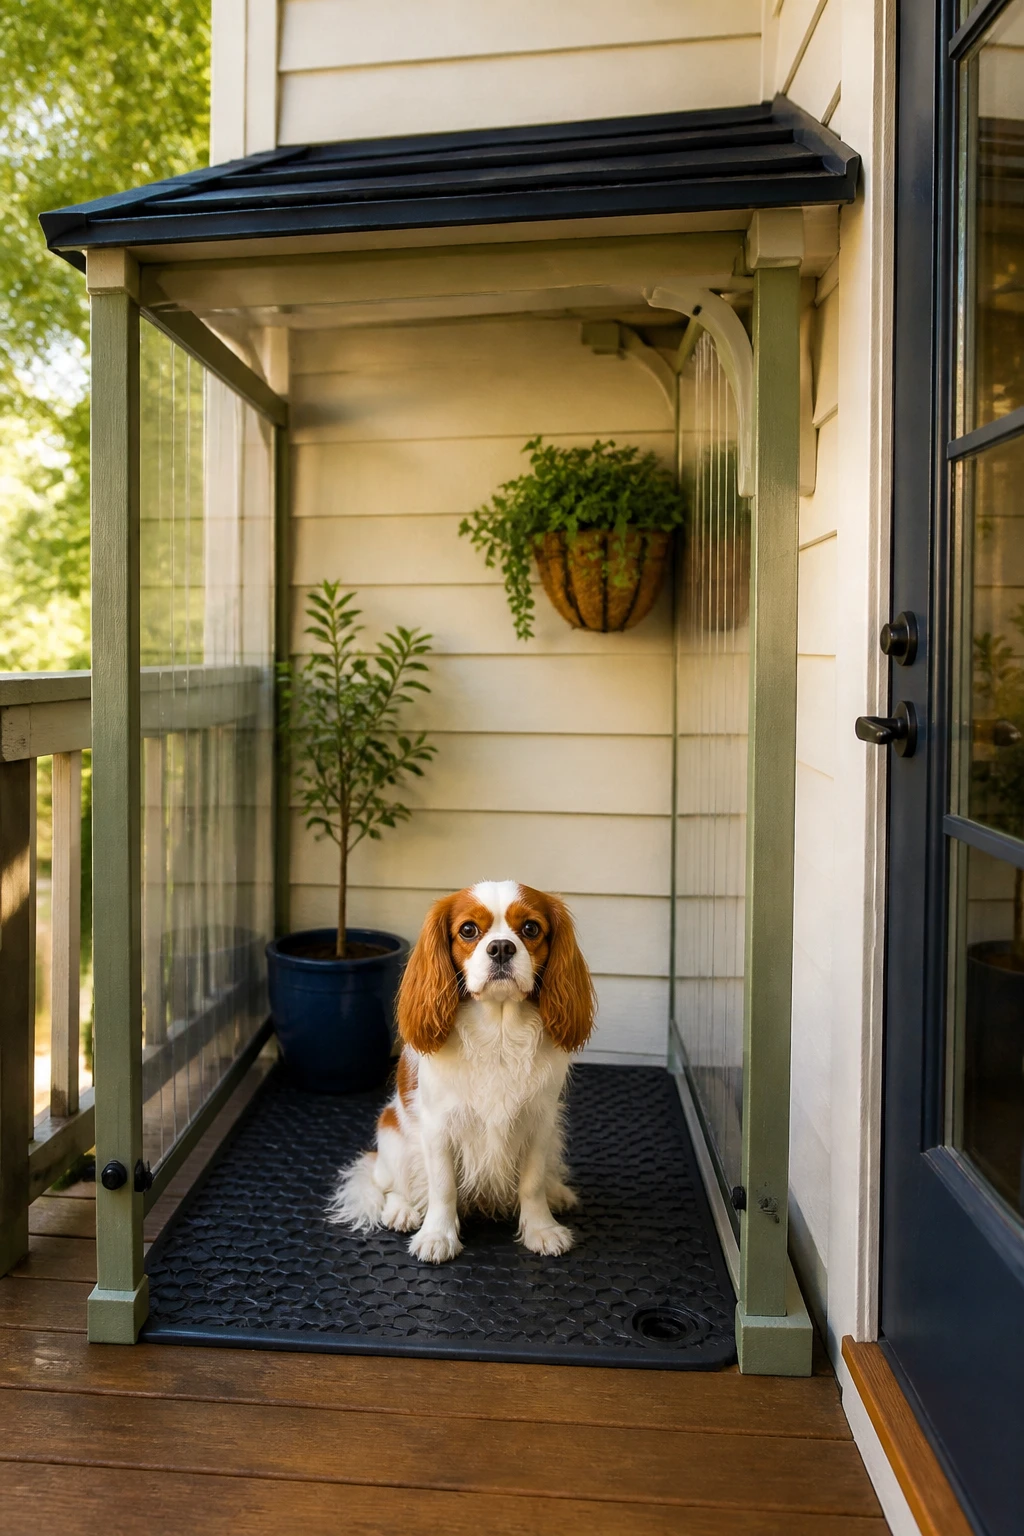
Turn a corner of your porch into a mini restroom that laughs at sideways snow. A small roof extension or awning plus side panels creates a protected zone that keeps falling flakes and gusts out. Dogs love familiar routes, so placing it right off the door speeds things up.
Materials
- Wall-mounted awning or polycarbonate canopy (look for UV-stable, snow-load rated models)
- Two side shields: lattice framed with clear corrugated panels or pressure-treated wood
- Non-slip, drain-friendly flooring (rubber stable mats or composite deck tiles)
- Weighted door mat to catch drips at the threshold
Mount the awning at a slight slope so meltwater runs away from the door. Keep side panels high enough to block wind (around 36–48 inches), but leave a top gap for ventilation. For flooring, I’d pick rubber stable mats—they’re heavy, easy to hose, and the texture gives great traction. Skip flimsy foam tiles; they freeze and shred fast.
Tips
- Angle the opening away from your prevailing winter wind.
- Add reflective tape or a solar path marker near steps for early mornings.
- Place a sealed storage tote with a scoop and pet-safe ice melt nearby—out of reach of chewers.
Best for: Homes with a covered entry or porch and dogs who hesitate on open snow. Worth it if you want a fast, permanent spot that blends into the house.
2. Set Up a DIY Pop-Up Canopy + Pee Patch Kit
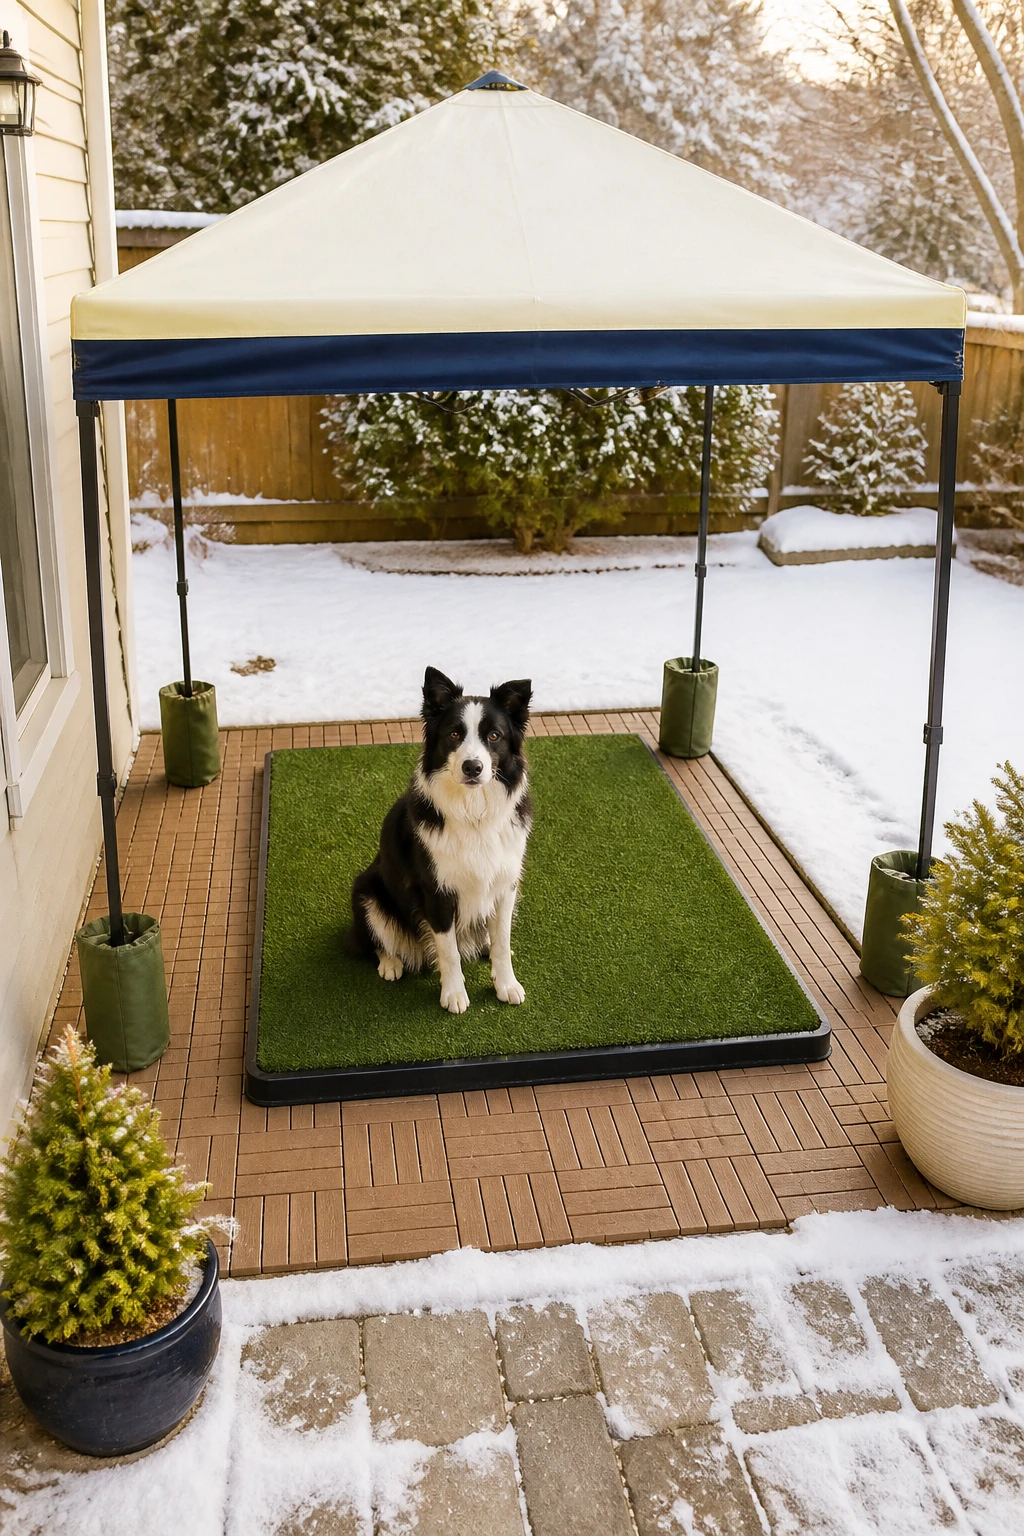
Need something fast that doesn’t require drilling into the house? A pop-up canopy anchored with weights creates instant shelter. Pair it with a portable potty zone so your dog has a clear “this is the spot” signal even when the yard looks like Antarctica.
Key Points
- Use a 6×6 or 8×8 pop-up canopy rated for winter resistance. Add weight plates or sandbags on each leg.
- Underfoot, lay down interlocking deck tiles topped with a washable grass mat or pea-gravel tray.
- For drainage, place a plastic utility tray under the grass pad. Rinse and enzyme-clean daily.
Place the canopy within 10–15 feet of your back door to cut exposure time. If your dog balks at new textures, start with a small patch of the mat right at the threshold and slowly move it to the canopy over a few days. IMO, this combo shines because you can move it as wind shifts or if a drift forms.
Safety & Maintenance
- Secure all cords, straps, and weights so nothing dangles—no chew temptations.
- Shake off snow build-up as soon as you notice sagging.
- Keep de-icer out of the potty zone to protect paws and grass mats; use pet-safe products only.
Best for: Renters, townhomes, or anyone who wants a flexible setup. I’d skip this if you face constant 40+ mph gusts—go with a fixed frame instead.
3. Convert A Garden Storage Shed Into A Weather-Smart Potty Alcove
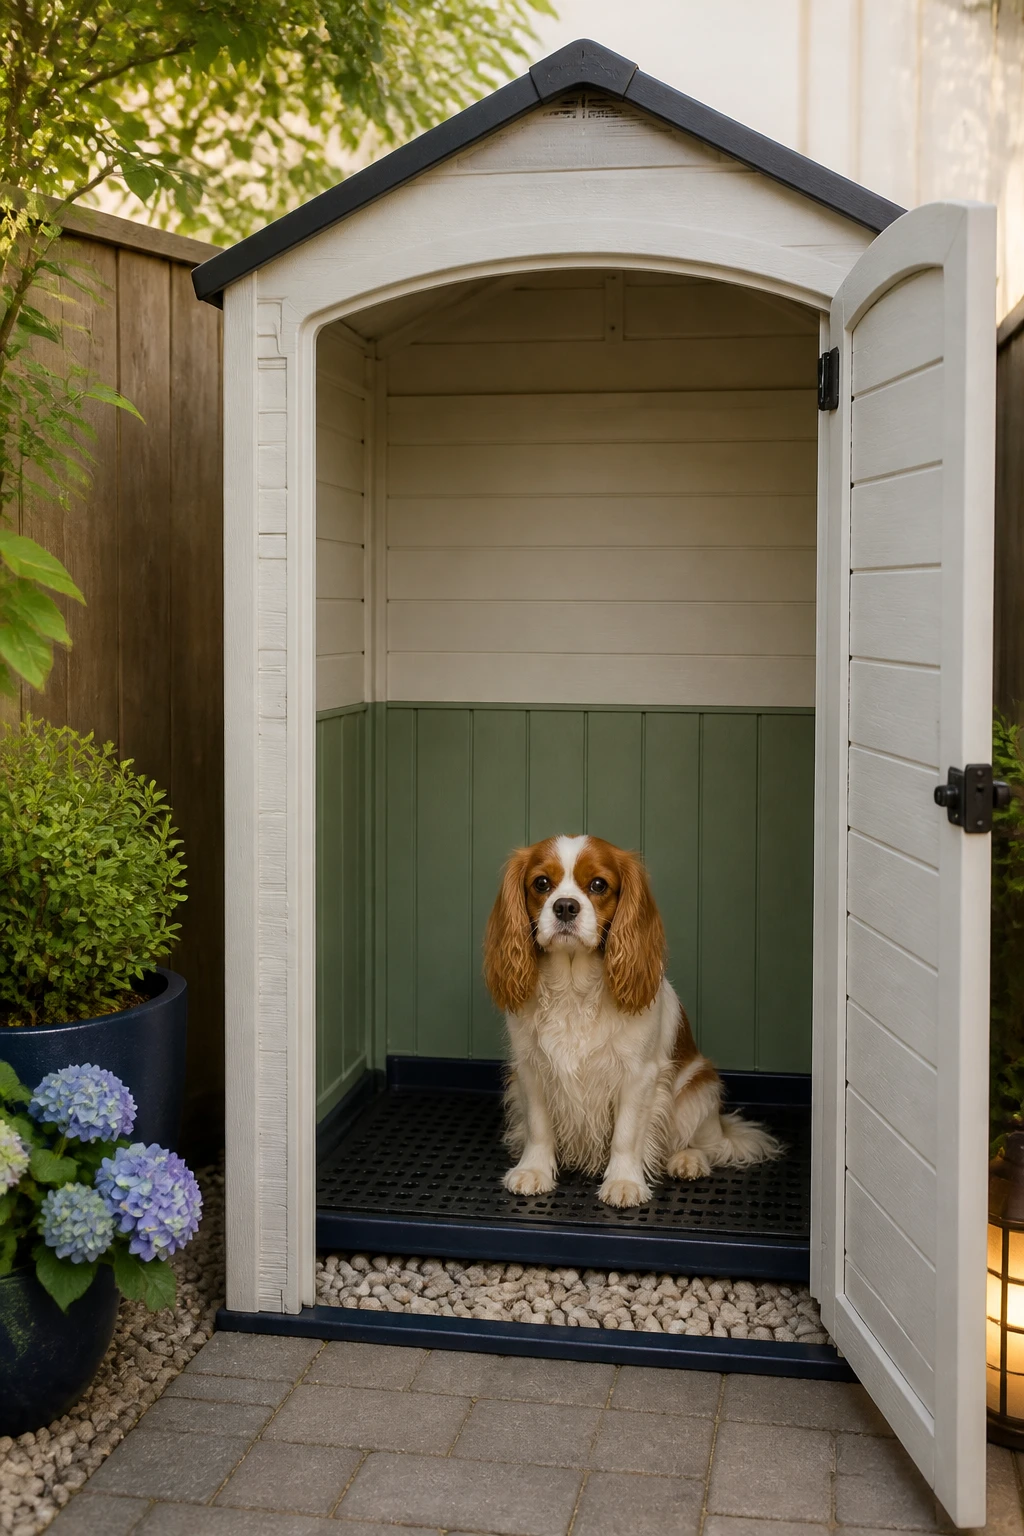
Small resin or wood sheds can double as a weatherproof restroom with the right modifications. You’ll get full roof cover, excellent wind protection, and a designated surface that stays usable in storms.
How To Do It
- Pick a shed with double doors and a low threshold; 4×6 feet is ideal for easy turning.
- Remove one door and install a half-height interior panel to keep bedding or gravel in place.
- Create a drainage layer: perforated rubber mat on top of river rock inside a shallow frame.
- Cut a small side vent near the roofline for airflow without drafts.
Mount a motion-activated, battery-powered puck light high and out of reach—no cords, no chewing. For flooring, composite grates over pea gravel drain fast and keep paws off slush. If you use wood, seal it with pet-safe, low-VOC exterior sealant so urine doesn’t soak in.
Upkeep Tips
- Scoop daily and flush with warm water + enzyme cleaner weekly.
- Place a boot tray outside the entrance for your own shoes, so the house stays clean too.
- Lay a rubber flap along the bottom edge of the open doorway to stop drifting snow.
Best for: Larger dogs or multi-dog homes that need space to move. Worth it if you want a solid, year-round station that can also store bags and cleaning supplies out of sight.
4. Create A Fence-Hugging Wind Tunnel With Clear Panels
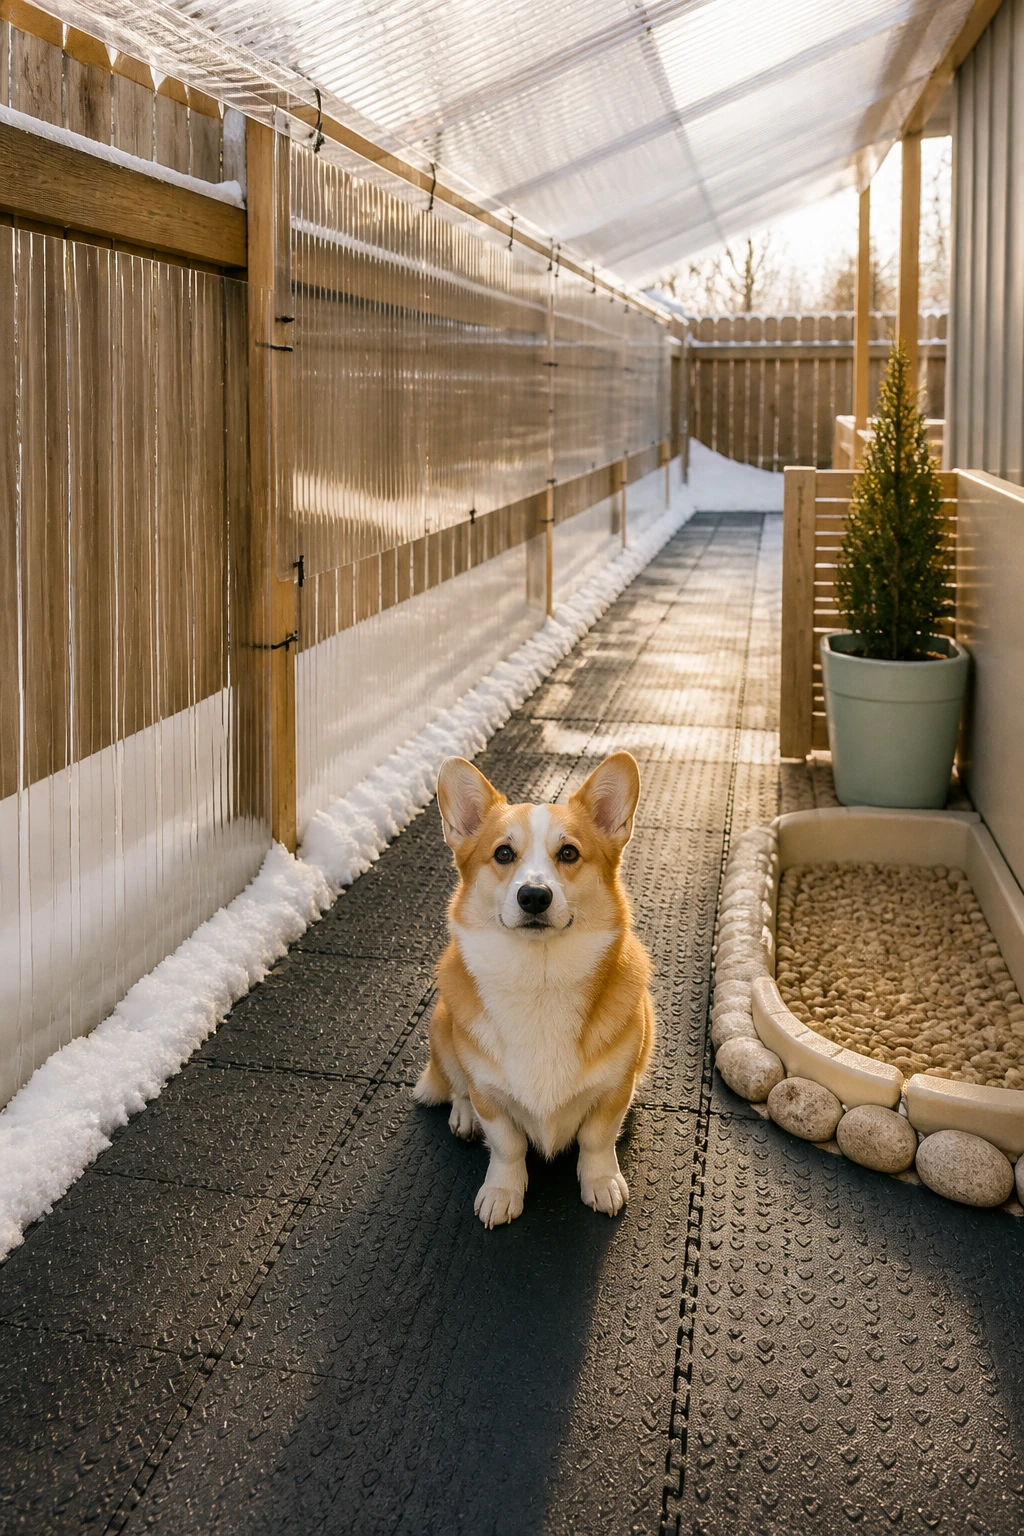
Not every yard needs a roof—sometimes blocking the wind and clearing a narrow channel does the trick. A sheltered “runway” along the fence gives dogs a quick, predictable route to a corner potty spot with much less snow underfoot.
Layout
- Pick a 3–4 foot wide strip along the fence from door to potty corner.
- Zip-tie clear corrugated polycarbonate panels to the fence to deflect wind and drifting.
- On the ground, install rubber pavers or traction mats with a broom finish for grip.
- Cap the potty corner with a small lean-to roof or a 2×4-framed top panel for overhead cover.
Clear panels keep sightlines open, which helps skittish pups. The runway also doubles as a daily shoveling path you can maintain in two minutes flat. I’d pick clear panels over tarps because tarps flap and spook some dogs, and they tear easily in ice.
Pro Tips
- Stagger panel seams so wind can’t funnel through one big gap.
- Elevate mats slightly with plastic spacers so meltwater drains underneath.
- Anchor the top of panels to fence posts using stainless screws and washers for durability.
Best for: Narrow side yards, long fence lines, and dogs that bolt straight to a corner. Skip it if your fence can’t support panels—use freestanding posts with crossbars instead.
5. Warm-Entrance Strategy: Mudroom Launch Pad + Exterior Overhang
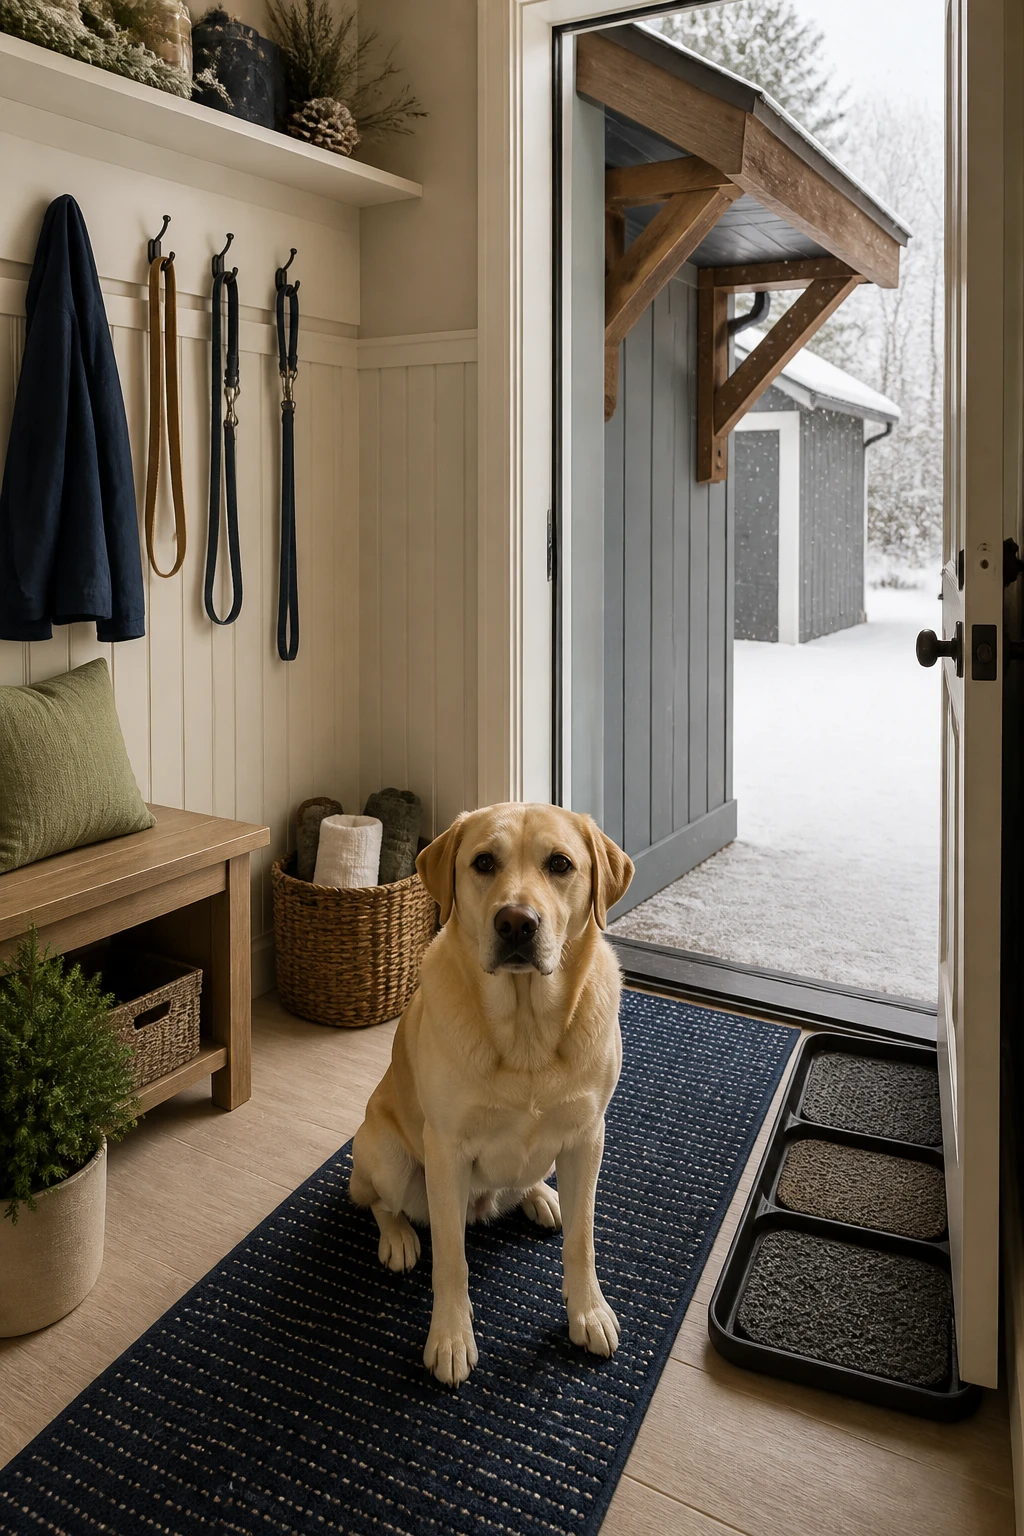
Sometimes the magic happens inside first. A dry staging area at the door plus a small outdoor overhang creates a quick, efficient in-and-out routine that dramatically reduces paw soak time.
Indoor Setup
- Place a heavy-duty boot tray with absorbent inserts right inside the door.
- Add a wall-mounted hook rack for leashes and a basket for towels and wipes.
- Lay a washable runner with rubber backing leading from the door to the crate or bed.
Outside, mount a compact overhang or door hood to stop snow from piling at the threshold. Toss down a rubber entry mat with a beveled edge so paws grab traction instantly. This micro-shelter doesn’t replace a full potty roof, but it buys crucial seconds and keeps the doorway safe.
Why It Works
- Dogs pause less when the door area isn’t a blast chiller.
- You can gear up quickly—coat, booties, leash—without juggling supplies.
- Cleanup gets faster, so routines stay consistent even on the roughest mornings.
Safety note: Keep heat sources like space heaters far from leashes, wood trim, and curious noses. No dangling cords—use cord covers and elevated outlets. Best for: Apartments with patios, homes without room for a big build, or anyone who wants speed and simplicity. Worth it if you need better workflow more than a giant structure.
Common Mistake to Avoid
Don’t lay down plush rugs, foam mats, or fabric runners outside and expect them to survive. They freeze, trap smells, and become chew magnets. Choose non-absorbent, high-traction surfaces that hose off easily and pair them with proper drainage so nothing becomes a slush sponge.
FAQ
How do I train my dog to use a new winter potty spot?
Leash up and guide them straight to the new zone after meals and naps. Reward immediately after they go. Keep paths shoveled, add a small piece of their previous surface (like a grass mat square), and stay consistent for a week. Most dogs lock in fast when the route is clear and wind-free.
What flooring works best under a covered potty shelter?
Rubber stable mats or composite deck tiles over a draining layer (pea gravel or perforated base) work best. They provide traction, resist urine absorption, and clean up with a quick rinse. Avoid carpet tiles or EVA foam; they get slick and degrade in freeze-thaw cycles.
Is heating necessary for outdoor potty shelters?
Generally no. Focus on blocking wind and keeping the route short. If ice forms, use pet-safe ice melt sparingly and shovel promptly. If you add warmth, opt for a heated water bowl nearby rather than heat mats, and keep any electrical parts fully protected from chewing and moisture.
How do I keep the shelter from collapsing under snow?
Choose snow-load rated roofs, add a slight pitch, and clear accumulation regularly. Reinforce frames with diagonal bracing at corners. For pop-ups, use heavy weights and drop the canopy during blizzards—reopen after the storm.
Will these setups work for small balconies?
Yes—scale down. Use a compact awning or door hood plus a 2×3 grass mat on a drainage tray. Ensure water flows into a contained pan and never off the edge. Keep everything secured with non-damaging anchors like Command hooks and weighted bases.
What about scent control in winter?
Cold temps help, but routine still matters. Rinse potty surfaces every day or two with warm water, then follow with an enzyme cleaner. Keep a closed bin for waste and swap liners often. Ventilation at the top of enclosed areas prevents stale air without chilling your dog.
Snow days don’t have to derail the bathroom routine. Pick one of these setups, keep the path clear, and watch your dog handle mornings like a pro. Dry paws, quick trips, happier humans—win-win.
As an Amazon Associate, I earn from qualifying purchases.