This post contains affiliate links. As an Amazon Associate, I earn from qualifying purchases, at no extra cost to you.
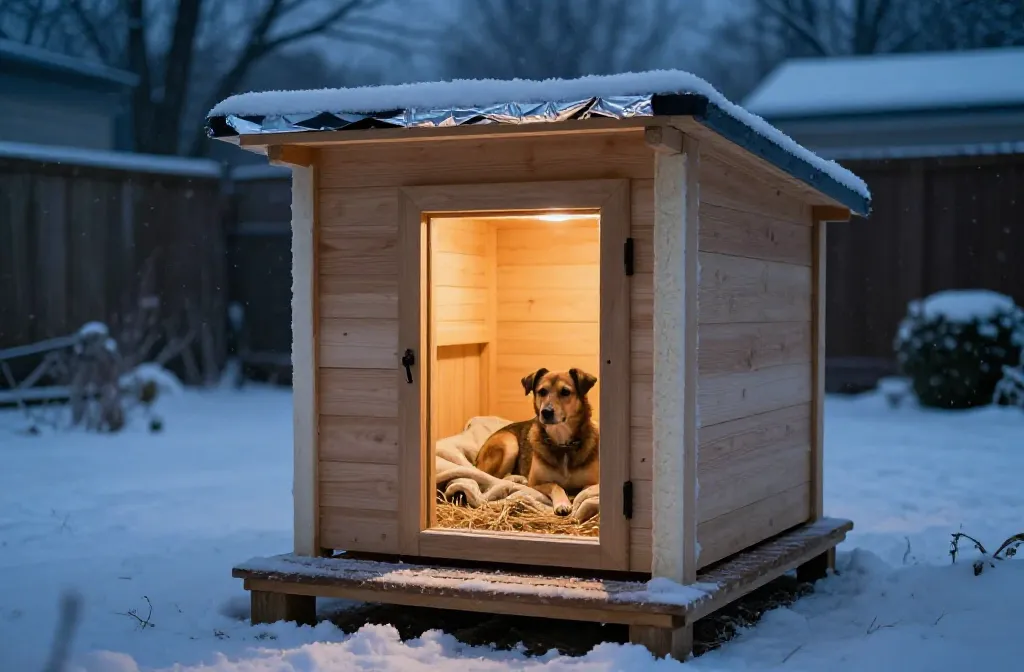
When the temperature drops, your dog’s outdoor house can lose heat fast. The good news? A few smart tweaks turn that drafty box into a snug retreat your pup will actually nap in. Let’s upgrade insulation, bedding, entrances, and heat sources so your dog rides out icy nights in comfort without risky hacks.
We’ll cover smart layout moves, DIY add-ons, and safe products that pull their weight. Expect practical steps, clear materials, and blunt opinions on what’s worth it vs. what I’d skip. Ready to build a winter-worthy haven?
1. Insulate Like You Mean It: Walls, Floor, And Roof
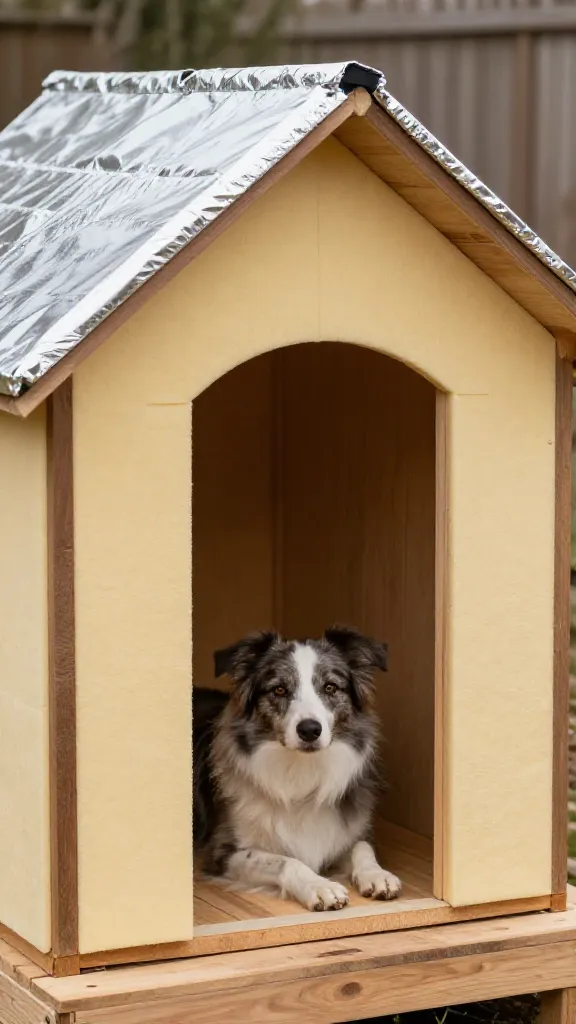
Heat escapes in every direction, so treat the dog house like a tiny cabin. Proper insulation traps your dog’s body warmth and reduces drafts so you rely less on heaters. The goal: air gaps sealed, surfaces lined, and flooring lifted.
Materials That Make Sense
- Rigid foam board (EPS/XPS) for walls and roof: easy to cut, high R-value
- Foil-faced foam as a radiant barrier under the roof
- Exterior-grade plywood to cover foam so teeth and claws can’t reach it
- Construction adhesive labeled low-VOC and pet-safe once cured
- Weatherstripping and silicone caulk for seams
- Raised platform or pallet to lift the house off frozen ground
How To Do It
- Cut foam to fit between studs or along interior walls. Aim for 1–2 inches thick.
- Adhere foam, tape seams with foil tape, then sheath with plywood so your dog can’t chew it.
- Lift the whole structure at least 2 inches off the ground. Add foam under the floor and top with plywood.
- Seal joints, corners, and any screw holes with silicone. No gaps = fewer drafts.
Pro tip: Keep the interior smaller rather than oversized. A snug space stays warmer from body heat. If your pup needs more room to sprawl in summer, consider a removable internal divider.
Worth it if: You want passive warmth without running cords. I’d skip fiberglass batts in reach of paws; the fibers can irritate skin and mouths.
Best for: Outdoor wooden or composite houses in regions with sustained freezing nights.
2. Draft Defense: A Smart Door And Wind Shield
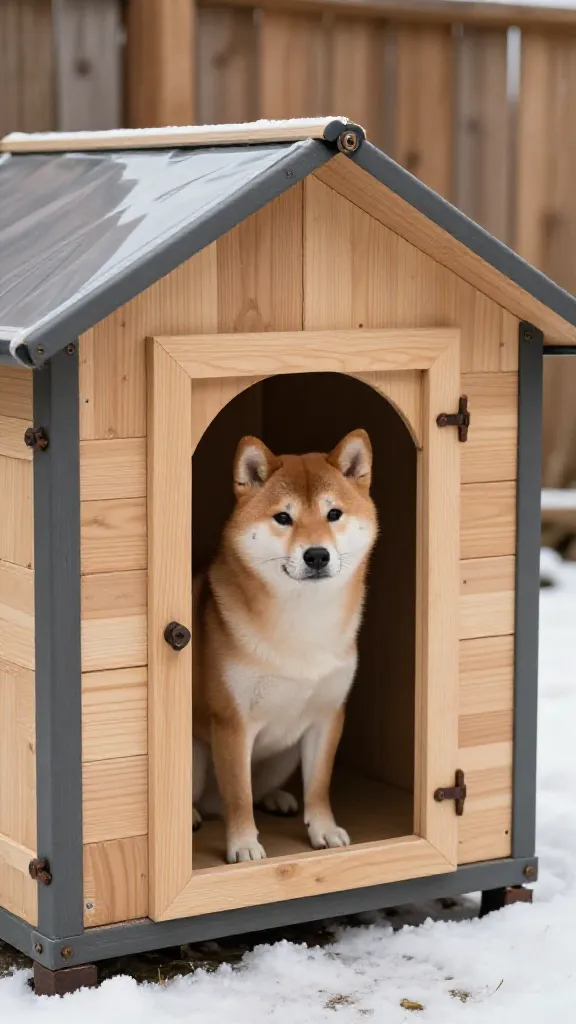
Open doorways invite wind, rain, and heat loss. Adding a safe flap or vestibule locks in warmth instantly. You’ll keep weather out while still giving your dog an easy entrance.
Good Door Options
- Weighted vinyl flap with rounded corners and smooth edges
- Double-flap system (two layered strips) for severe wind
- DIY tunnel/vestibule using a short plywood box attached to the doorway
Installation Tips
- Mount the flap so the bottom brushes the floor, leaving minimal gap.
- Use rust-resistant screws and large washers so the flap doesn’t tear.
- Sand or pad any sharp doorframe edges. No exposed metal where a nose pushes through.
- Face the entrance away from prevailing winds. If possible, tuck the house behind a fence panel.
Safety check: Avoid hard plastic with brittle edges in cold snaps. Also avoid magnets that could detach. Keep the flap chew-resistant but flexible.
I’d pick a two-layer vinyl flap for deep winter. I’d skip fabric strips that soak up water and freeze.
Best for: Most standard dog houses, especially in open yards with steady wind.
Quick Add-On: Exterior Wind Break
- Plant a temporary barrier: snow fencing, solid screen, or a wood panel set 2–3 feet in front of the door to create a protected pocket.
- Anchor it securely with ground spikes or deck screws in a small frame so it won’t topple.
Use this when storms roll in or if you can’t modify the door immediately.
3. Warm From The Bottom Up: Bedding That Actually Insulates
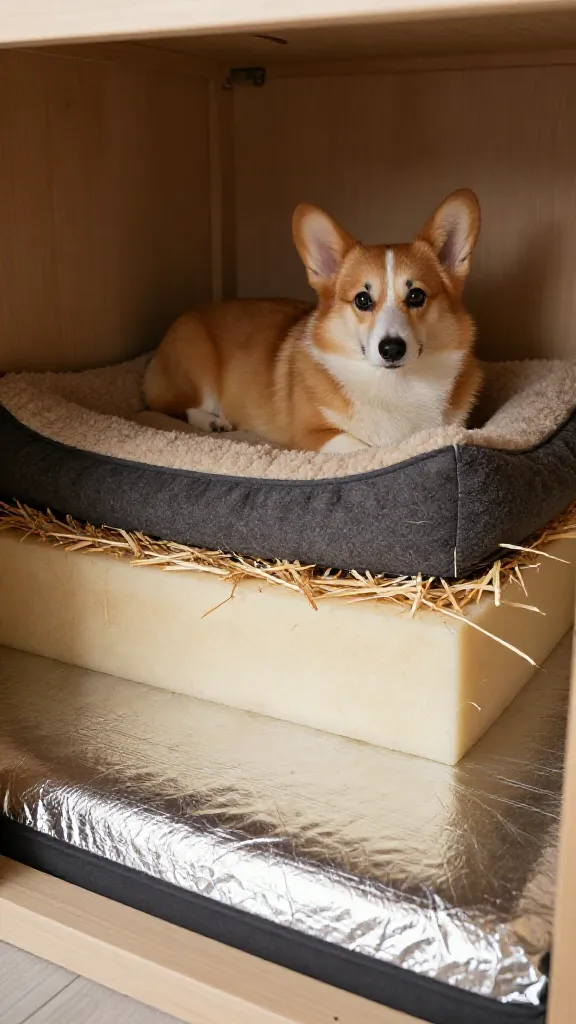
Cold creeps up from the floor first. The right base and bedding combo stops conductive heat loss and keeps joints comfortable. Think layers: a thermal barrier below, then washable padding on top.
Build The Bed Stack
- Bottom layer: off-ground platform or foam-insulated floor
- Middle layer: reflective mat or closed-cell foam pad (camping foam works)
- Top layer: thick, washable crate pad with non-slip backing
- Optional: straw (not hay) if you need extra insulation and can replace it frequently
Why Straw, Not Blankets Outdoors
- Straw sheds moisture and traps air. Replace when it compresses or gets damp.
- Blankets can wick moisture, freeze, and chill your dog. If you use fabric, choose quick-dry pads designed for kennels.
Practical Upkeep
- Shake out and wash the top pad weekly. Swap straw every 1–2 weeks or after storms.
- Check for chewed foam. If your dog shreds bedding, switch to a tougher, chew-resistant pad and skip loose fill.
Worth it if: You see your dog circling forever before lying down—that’s them hunting for warmth. I’d skip memory foam outdoors in deep wet winter; it holds water.
Best for: Dogs who sleep on their elbows or hips, and houses set on concrete or frozen soil.
4. Safe Heat: Low-Risk Warmers, Not Fire Hazards
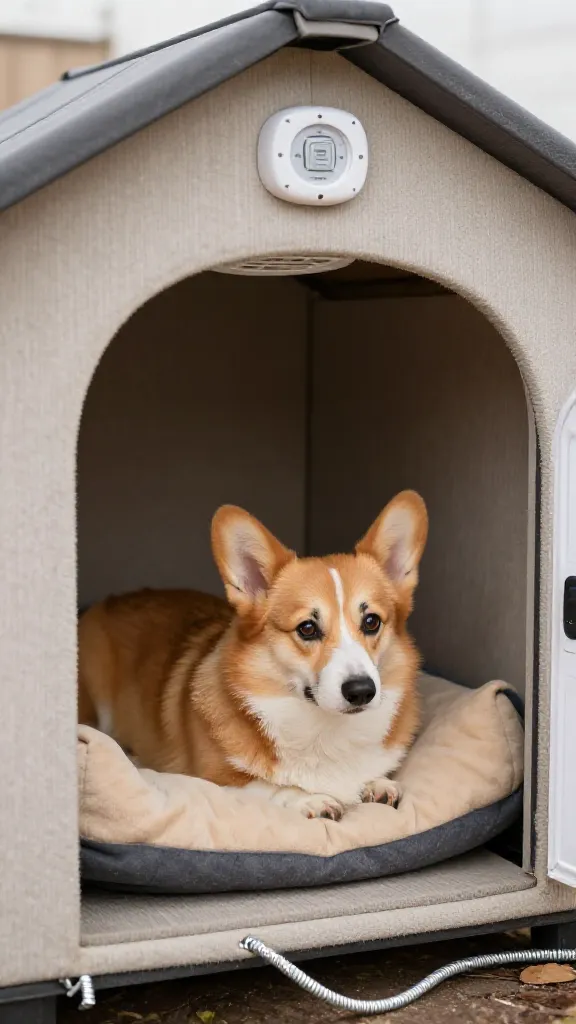
Active heating can help in subzero conditions, but you must choose products designed for animals. Skip space heaters or DIY bulbs inside wood. Go for chew-protected, low-watt solutions and install correctly.
Safer Heating Options
- Outdoor-rated heated kennel pad with a steel-wrapped cord and thermostat
- Low-watt ceramic heat panel mounted to the ceiling with a guard
- Self-warming bed (reflective core) for no-electric setups
Setup Tips
- Mount cords through a rear wall grommet and run them through conduit. Keep plugs outside the house.
- Use a GFCI outlet and a weatherproof cover. Keep connections off the ground.
- Position heated pads to one side, not wall-to-wall, so your dog can choose a cooler spot.
- Never use heat lamps with exposed bulbs. They break, overheat, and start fires—hard pass.
Thermal Sanity Checks
- Use a wireless thermometer with a base station indoors. Set an alert if temps dip under your target.
- Touch-test the surface with the back of your hand for 10 seconds. Uncomfortably hot? It’s wrong.
I’d pick a heated kennel pad from a brand that lists exact wattage and outdoor rating. I’d skip electric blankets and reptile mats not designed for dogs.
Best for: Arctic nights, senior dogs, lean breeds, or short-coated pups that struggle to keep heat.
5. Micro-Layout Magic: Right Size, Right Height, Right Spot
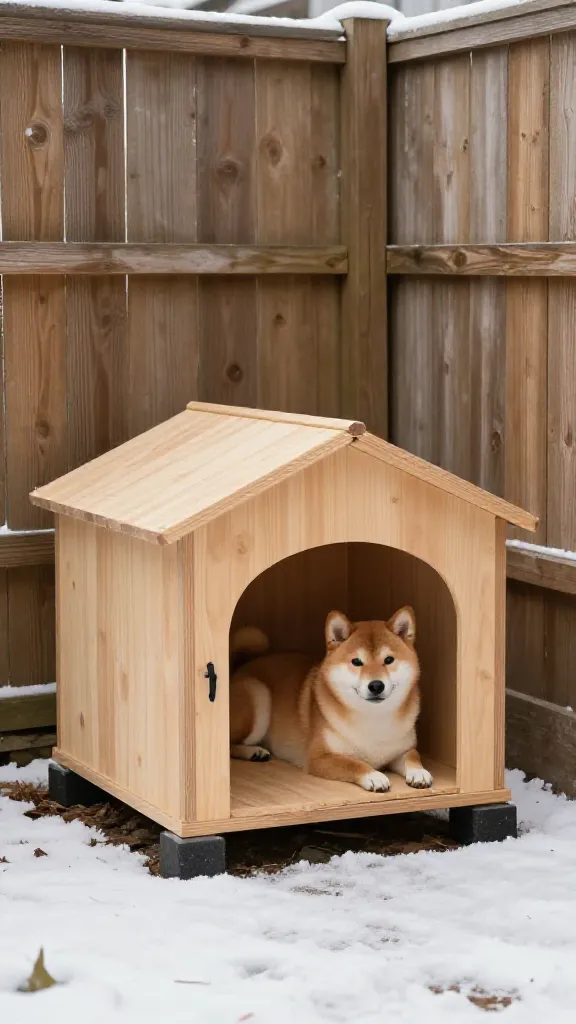
Sometimes the biggest gains come from small layout choices. Shrink the interior volume, raise the floor, and park the house where the elements hit least. You’ll improve warmth without buying much.
Tighten The Interior
- Add a removable partition to reduce open space during winter. Think lightweight plywood with a handhold cutout.
- Keep the ceiling height modest. Tall ceilings pool cold air above your dog.
Place It Smart
- Set the house on the leeward side of a building or fence to block prevailing winds.
- Aim the doorway south or southeast in many regions to catch gentler light and avoid howling gusts.
- Put rubber feet or pavers under the base to avoid snowmelt pooling and wood rot.
Vent, Don’t Draft
- Include tiny high vents on opposite walls (covered with hardware cloth). Warm air stays in, humidity escapes, and condensation won’t chill your dog.
- Close or reduce vent size during extreme cold using sliding covers or magnetic plates placed outside chewing range.
Worth it if: You want better warmth without heavy tools. I’d skip sealing every single air path—controlled venting prevents damp, which feels colder than dry air.
Best for: Any house that feels “roomy” or sits in a gusty corner of the yard.
Common Mistake to Avoid
Don’t stack plush blankets and call it a day. Thick fabric can trap moisture, freeze, and make your dog colder. Instead, prioritize insulation, a raised floor, and a proper door flap. Add a washable top pad or straw and check it often. If your dog chews bedding, switch to a tough, single-piece mat and skip loose fibers altogether.
FAQ
How cold is too cold for a dog to sleep in an outdoor house?
That depends on breed, coat, age, and health. As a baseline, start winterizing when night temps dip below 45°F. For short-coated or senior pups, bring them inside or use safe heat if temps fall near freezing. Subzero nights? I’d bring most dogs indoors or to a heated garage with a crate setup.
Is straw really better than blankets?
For outdoor houses, yes. Straw insulates and dries quickly, while blankets can pull in moisture and hold cold. Use a washable crate pad on top for comfort and replace straw regularly. If your dog shreds straw, use a durable, closed-cell foam pad under a tough cover instead.
Can I use a regular space heater or a heat lamp?
No. Space heaters and exposed lamps pose fire risks and can overheat small spaces. Choose outdoor-rated heated kennel pads or ceiling-mounted low-watt ceramic panels with guards. Always route cords through conduit and plug into a GFCI outlet with a weatherproof cover.
What size should the dog house be for winter?
Just big enough for your dog to stand, turn, and lie down. Smaller volume warms faster from body heat. If your current house feels cavernous, install a temporary divider to shrink the sleeping area during cold months.
How do I keep the house dry during snow and rain?
Lift the base off the ground, add a slight roof overhang, point the door away from wind, and use a flap or vestibule. Seal seams with silicone and maintain small high vents so condensation escapes. Replace wet bedding immediately—damp equals chilly.
Are heated pads safe for chewers?
Use only pads with steel-wrapped cords and chew-resistant covers, and run the cord through metal conduit. If your dog targets cords, skip powered heat and maximize insulation and reflective layers instead. Always give a cool zone so your dog can move away from warmth.
You don’t need a full rebuild to make a meaningful difference. With smart insulation, a wind-blocking entrance, and a layered bed, your dog’s house can handle icy nights like a champ. Pick one upgrade to start this weekend and add the rest as the season deepens—your pup will thank you with longer naps.
As an Amazon Associate, I earn from qualifying purchases.